How to Choose the Best Squat Rack to Start a Home Gym
Evaluating the Long-Term Value of Your Initial Investment
When sourcing the best squat rack to start home gym setups, many buyers fall into the trap of prioritizing low upfront costs over total lifecycle value. A smart procurement strategy requires looking beyond the initial invoice to evaluate three critical checkpoints: the risk of structural failure under heavy loads, the technical specifications of the steel gauge, and the logistical reality of replacing cheap components later. If a rack lacks high-grade steel or precision welding, you aren't just saving money; you are potentially compromising your safety and your future budget.
Understanding the relationship between durability vs. price is essential for anyone building beginner weightlifting setups. A budget-tier rack might seem attractive, but it often lacks the structural integrity required for progressive overload training. Investing in a high-quality unit ensures long-term value, as a robust frame can withstand years of high-intensity use without wobbling or bending. For those seeking home gym equipment essentials, choosing a professional-grade foundation means you won't be forced to upgrade your entire setup every time your strength increases.
To make an informed decision, you should view your purchase through the lens of cost-per-use. While a lower price point is tempting for beginner weightlifting setups, the material quality—specifically the steel gauge and powder coating thickness—determines how many years of training you actually get out of the unit. A compact squat rack guide often highlights that space-saving models can sometimes sacrifice stability, so choosing a mid-to-high tier model ensures your home gym equipment essentials remain functional as you progress.
The following framework helps differentiate between entry-level options and long-term assets:
| Feature Tier | Typical Build | Ideal For | Value Proposition |
|---|---|---|---|
| Budget-Friendly | Lightweight steel, basic J-cups | Casual/Occasional use | Lowest upfront cost |
| Mid-Range | Standard gauge steel, improved stability | Regular strength training | Balanced durability/price |
| Premium/Commercial | Heavy-duty steel, precision welding | Serious/Daily heavy lifting | Highest long-term value |
Ultimately, finding the best squat rack to start home gym environments requires balancing your immediate budget against the future cost of replacement. A slightly higher initial investment in a high-grade frame prevents the need for a premature upgrade as your training intensity evolves.
To truly optimize your budget, adopt an investment mindset that prioritizes scalability over immediate savings. While it is tempting to select the most inexpensive option available, true future-proofing involves selecting a foundation that can grow alongside your strength levels. This means looking for modular designs or racks that offer compatible accessories—such as adjustable spotter arms or weight storage attachments—which can be added later without replacing the core structure.
When curating your home gym equipment essentials, remember that a rack is the anchor of your entire training space. Choosing a unit with a higher capacity for weight and more versatile attachment points ensures that your initial purchase remains a centerpiece rather than a temporary fixture. By focusing on quality and scalability now, you avoid the hidden costs of frequent replacements, ensuring your setup evolves seamlessly from a beginner weightlifting setup into a high-performance training station.
Defining Your Training Space and Footprint Requirements
One of the most frequent oversights in beginner weightlifting setups is failing to distinguish between the equipment's physical dimensions and its operational footprint. When sourcing the best squat rack to start home gym projects, many buyers only look at the product datasheet. However, a rack that fits a specific corner on paper may become a liability during an actual heavy set if you haven't accounted for clearance zones.
To ensure a safe environment, you must factor in a safety buffer for barbell whip, plate loading, and lateral movement. A rack with a 48-inch depth requires significantly more room once you account for the length of an Olympic barbell and the space needed to step in and out of the lift. Ignoring these spatial realities can lead to damaged walls or, worse, restricted movement during critical lifts.
To help you plan your layout, consider how different storage configurations impact your available floor area:
| Storage Configuration | Space Efficiency | Ideal For | Procurement Note |
|---|---|---|---|
| Integrated Plate Pegs | High | Compact areas | Reduces external footprint |
| Wall-Mounted Racks | Maximum | Small studios | Fixed location only |
| Standalone Multi-Rack | Moderate | Dedicated gyms | Requires wider clearance |
When evaluating home gym equipment essentials, always measure your ceiling height and floor clearance before finalizing any order to ensure your compact squat rack guide requirements are truly met.
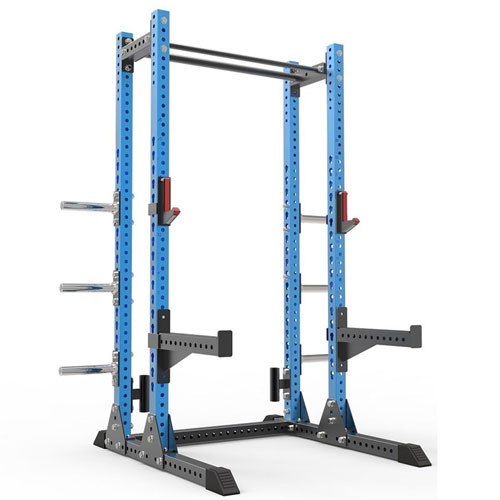
Selecting the right structural profile is a critical step in your compact squat rack guide. Depending on your square footage, you may need to choose between a full-scale powerhouse or a highly efficient, streamlined model. While a full power rack offers maximum stability and safety features, it demands a substantial footprint. In contrast, half racks and wall-mounted options serve as excellent space-saving options for those working with limited dimensions.
The following comparison helps visualize how different rack types impact your training area, ensuring you select the best squat rack to start home gym builds without compromising on movement or safety:
| Rack Type | Footprint Size | Primary Advantage | Best Use Case |
|---|---|---|---|
| Full Power Rack | Large | Maximum safety/stability | Dedicated garage or basement |
| Half Rack | Moderate | Versatility & accessibility | Multi-purpose training rooms |
| Wall-Mounted | Minimal | Ultimate space efficiency | Small apartments or studios |
When sourcing home gym equipment essentials, remember that a smaller footprint often requires more strategic planning regarding barbell length and weight plate storage to maintain a professional training standard.
Beyond the floor plan, verticality is a critical factor that many distributors and end-users overlook. Even if your floor space is sufficient, insufficient vertical clearance can render a high-quality rack unusable. You must account for the total height of the rack plus the user's reach during overhead movement, such as strict presses or snatches.
A common mistake in beginner weightlifting setups is neglecting the relationship between ceiling height and the equipment's top crossmember. If you plan to perform explosive lifts, you need enough room to ensure the barbell does not strike the ceiling. Furthermore, always cross-reference your barbell length with the rack's height; a long Olympic bar requires a ceiling that allows for a full range of motion without interference. When sourcing the best squat rack to start home gym builds, we recommend measuring from the highest point of the rack to the ceiling to ensure your training remains safe and unobstructed.
Core Structural Features for Beginner Weightlifting Setups
When investing in home gym equipment essentials, the most critical factor isn't the aesthetic—it is the underlying engineering. For those searching for the best squat rack to start home gym journeys, the temptation often lies in selecting lightweight, budget-friendly models. However, from a professional procurement standpoint, prioritizing heavy-duty construction is non-negotiable to ensure long-term safety and value.
The longevity of your setup depends heavily on the steel gauge used in the frame fabrication. High-quality racks typically utilize thicker-walled steel to prevent bending or structural fatigue under heavy loads. Without sufficient structural stability, even a modest increase in weight can compromise the integrity of the unit. When sourcing equipment, always verify that the frame is built for high-impact resistance, ensuring that your beginner weightlifting setups remain a reliable foundation for years of progressive overload rather than a disposable purchase.
Selecting the right architecture is a vital step in any compact squat rack guide. Depending on your available square footage and intended training intensity, the frame geometry will dictate both the footprint and the total weight capacity. For many, the trade-off between space-saving designs and maximum stability is the primary decision point during the procurement process.
To help you navigate these beginner weightlifting setups, we have provided a frame material comparison below. This table outlines how different structural configurations impact your training environment.
| Rack Configuration | Typical Frame Profile | Weight Capacity | Stability vs. Footprint |
|---|---|---|---|
| Space-Saver / Wall-Mounted | Lightweight Steel | Low to Moderate | Minimal footprint; high stability if bolted correctly. |
| Half Rack | Medium-Gauge Steel | Moderate to High | Balanced; provides more freedom of movement. |
| Full Power Rack | Heavy-Duty Steel | Very High | Large footprint; maximum stability for heavy lifting. |
When determining the best squat rack to start home gym projects, consider that a more robust frame often requires more floor space. While a compact model is excellent for tight quarters, ensure the structural integrity matches your long-term strength goals.
Beyond the frame profile, true structural durability is defined by how the components are joined. In the world of home gym equipment essentials, the distinction between bolt-on and weld-on construction can significantly impact your daily training experience. While bolt-on systems offer excellent modularity and easier shipping logistics, the quality of the hardware used is paramount. High-grade, industrial-strength bolts are necessary to prevent wobbling or shifting during heavy repetitions.
For those seeking the most rigid beginner weightlifting setups, reinforced welding at critical stress points provides a seamless, unwavering structure. When evaluating a compact squat rack guide, look for equipment that adheres to rigorous safety standards regarding upright thickness and joint reinforcement. A rack that lacks high-quality connection points may suffer from "racking"—a dangerous lateral movement—under heavy loads. Prioritizing these manufacturing details ensures that your investment remains a stable, secure environment for progressive lifting, rather than a liability.
Navigating the Compact Squat Rack Guide for Small Areas
Before finalizing your procurement, you must account for the most significant constraint in residential settings: real estate. Unlike commercial facilities with high ceilings and expansive floor plans, home environments demand a strategic approach to space-saving dimensions. When sourcing the best squat rack to start home gym projects, the primary tension lies between the footprint of the unit and its functional utility.
A common oversight in beginner weightlifting setups is failing to calculate floor clearance and the "buffer zone" required for barbell movement. A rack might physically fit in a corner, but without sufficient lateral room for plate loading or vertical clearance for overhead presses, it becomes a liability. We recommend evaluating the total operational area—not just the base dimensions—to ensure your equipment remains both safe and practical within a confined room.
To help you visualize your layout, we have categorized the most common configurations found in our compact squat rack guide. Choosing the right model depends on whether you prioritize structural stability or total floor freedom.
| Rack Type | Footprint Profile | Ideal Use Case |
|---|---|---|
| Half Rack | Moderate (Requires side clearance) | Standard home gym equipment essentials for dedicated lifters. |
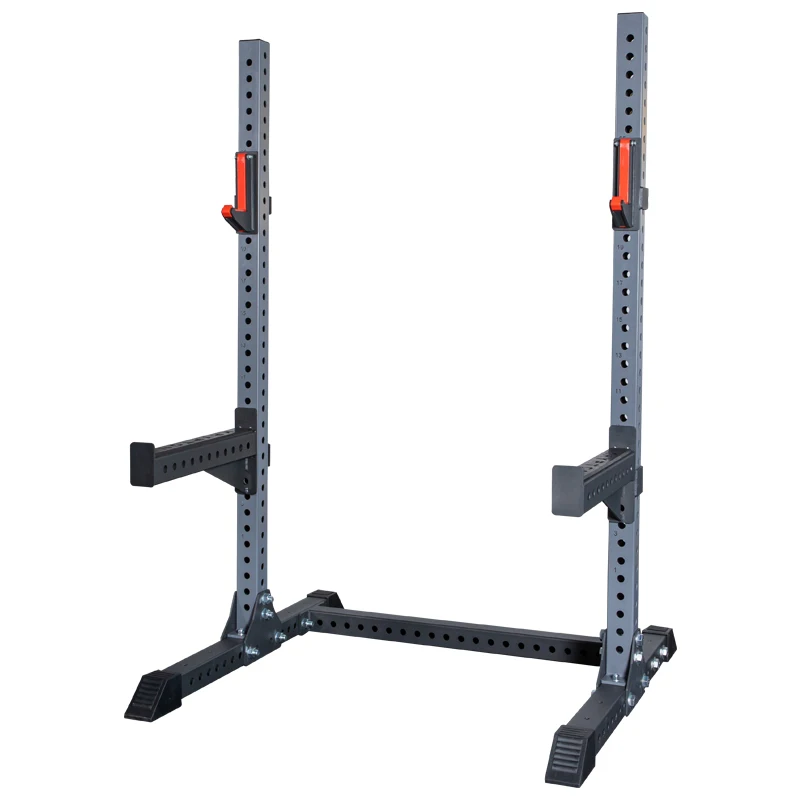
| Squat Stand | Minimal (Highly portable) | Small rooms or beginner weightlifting setups on a budget. |
| Wall-Mounted | Zero Floor Footprint | Extreme space constraints; utilizes wall-mounted options for efficiency. |
If you are working with a multi-purpose room, wall-mounted options offer the ultimate solution by reclaiming floor space when the bar is not in use. However, for those seeking a balance of durability and versatility, a half rack remains a staple in high-quality home gym equipment essentials. When planning your layout, always account for the width of your Olympic barbell to ensure you aren't cutting corners on safety.
The Essential Buffer Zone: Measuring for Safety and Movement
To ensure your training environment remains functional, you must look beyond the physical footprint of the metal frame. A critical factor in selecting the best squat rack to start home gym setups is calculating the movement radius. This includes the total width of the barbell length plus the space required to load and unload weight plates. If your rack is positioned too close to a wall or furniture, you may find it impossible to slide plates onto the sleeves safely.
We suggest implementing a strict safety clearance protocol. A professional-grade compact squat rack guide recommends a minimum of 3 to 4 feet of open space on either side of the barbell. This buffer zone prevents collisions during heavy lifts and allows for natural lateral movement. For small area optimization, consider the verticality of your room as well; ensure there is ample headroom to avoid hitting low-hanging fixtures during overhead movements. Prioritizing these dimensions during the planning stage prevents the common mistake of purchasing equipment that is too large for its intended environment.
Essential Safety Components and Accessory Compatibility
When designing beginner weightlifting setups, the focus often shifts toward aesthetics or footprint, but professional-grade weightlifting safety must remain the non-negotiable priority. For those sourcing equipment, understanding the mechanical safeguards is vital to ensuring long-term durability and user protection. High-quality racks must feature robust spotter arms or adjustable safety pins that can withstand significant impact and heavy load shifts.
A common mistake in budget-driven procurement is overlooking the structural integrity of these specific components. While a basic frame might look sturdy, the safety mechanisms are what truly prevent catastrophic failure during a failed lift. When selecting the best squat rack to start home gym operations, ensure the attachment points are reinforced and the locking mechanisms are intuitive. Whether you are opting for fixed steel pins or adjustable arms, these features act as the final line of defense, allowing lifters to push their limits with the confidence that their equipment is engineered to catch them safely.
Beyond the core frame, your long-term satisfaction depends heavily on accessory compatibility. A common pitfall in sourcing is purchasing a high-quality frame only to find that secondary attachments do not fit the upright dimensions or hole spacing. To avoid these compatibility issues, treat your purchase as a modular ecosystem rather than a static piece of steel. This is especially critical in a compact squat rack guide context, where every inch of vertical space must be utilized efficiently through smart customization options.
Before finalizing your order, use the following checklist to ensure your chosen model supports the essential add-ons required for a versatile training environment:
| Accessory Type | What to Verify for Compatibility | Functionality Goal |
|---|---|---|
| J-cups | Upright thickness (e.g., 2x2 vs 3x3) and sleeve diameter | Secure barbell resting and easy transitions |
| Pull-up Bar | Mounting style (Bolt-on vs. Integrated) and weight capacity | Stable upper-body training without frame wobble |
| Dip Station | Attachment point reinforcement and lever clearance | Smooth, ergonomic accessory integration |
Investing in a system that allows for modular upgrades ensures that your home gym equipment essentials can evolve alongside your strength levels, preventing the need for premature replacement.
Long-Term Maintenance and Upkeep
Once you have secured the best squat rack to start home gym activities, the focus must shift from initial procurement to consistent maintenance. A high-quality steel frame is a long-term investment, but its equipment longevity depends heavily on how well you manage environmental factors and mechanical wear. Even the most durable home gym equipment essentials require periodic oversight to remain safe for heavy lifting.
To ensure peak performance, implement a routine bolt tightening schedule. High-impact movements can occasionally loosen hardware over time, so checking every connection point every few months is a vital safety habit. Additionally, pay close attention to rust prevention; if your gym is located in a high-humidity area, ensuring the powder coating remains intact is essential to prevent oxidation. Finally, applying a light lubrication to moving parts, such as adjustable pins or sliding mechanisms, will prevent friction-related wear and keep your beginner weightlifting setups operating smoothly for years to come.
Sourcing High-Quality Home Gym Equipment Essentials
When building a personal training space, the most common mistake is overlooking the foundational build quality of your hardware. For those seeking the best squat rack to start home gym setups, the focus must shift from aesthetics to long-term durability and structural stability. A rack that wobbles under heavy loads is not just a nuisance; it is a significant safety liability.
From a procurement standpoint, the quality of the metal determines the lifespan of your investment. High-grade steel gauge is the most critical specification to verify. We recommend prioritizing heavy-duty steel construction to ensure the frame can withstand progressive overload without deformation. Additionally, look for premium powder coating finishes. A high-quality coating does more than look professional—it provides a vital layer of defense against oxidation and moisture, ensuring your equipment remains rust-free even in varying residential environments. Investing in these home gym equipment essentials ensures your setup remains a reliable cornerstone of your training for years to come.
To ensure your beginner weightlifting setups can handle increasing loads, you must understand the relationship between steel thickness and weight capacity. Not all metal frames are created equal; a lightweight frame might suffice for basic calisthenics, but it will fail during heavy compound movements. When evaluating compact squat rack guide specifications, pay close attention to the gauge of the steel used in the uprights and crossmembers.
The following comparison illustrates how material thickness directly influences the utility and safety of your equipment:
| Steel Thickness (Gauge) | Typical Usage Intensity | Estimated Weight Capacity | Ideal For |
|---|---|---|---|
| 11-Gauge (Heavy Duty) | High / Commercial Grade | 800+ lbs | Advanced lifters & heavy compounds |
| 14-Gauge (Standard) | Moderate / Regular Use | 500 - 700 lbs | Serious hobbyists & progressive training |
| 16-Gauge (Lightweight) | Low / Occasional Use | Under 400 lbs | Basic fitness & entry-level movements |
Choosing a higher-gauge steel option provides a much larger margin of safety. While a thinner frame may be more budget-friendly initially, it lacks the structural integrity required for long-term progression. For a sustainable setup, we suggest prioritizing a frame that offers a substantial weight capacity buffer to accommodate your future strength gains.
Beyond checking the steel gauge, a physical inspection is the most effective way to verify long-term reliability. If you are inspecting a sample or reviewing detailed factory specifications, look closely at the weld quality. Seamless, smooth welds indicate high-precision manufacturing, whereas jagged or uneven junctions suggest structural weak points that could fail under stress. This is a critical step in any compact squat rack guide, as the joints bear the brunt of lateral forces during heavy lifts.
Furthermore, pay close attention to the hardware and assembly components. A high-quality rack should feature consistent bolt tightness and precision-drilled holes that allow for smooth adjustments. If the bolts feel loose or the alignment is slightly off, the rack may lack the necessary rigidity for heavy training. Finally, verify the rust resistance by inspecting the finish; a uniform, dense coating ensures the frame survives humidity and perspiration. Prioritizing these tactile details will help you secure the best squat rack to start home gym environments that remain safe and stable through years of intense use.
Common Pitfalls When Selecting Your First Rack
When sourcing beginner weightlifting setups, many buyers fall into the "cheap price trap." It is tempting to select the lowest bidder to save on initial capital, but in the fitness industry, a low price often signals a compromise in structural integrity. From a procurement standpoint, the hidden costs of low-quality steel far outweigh the initial savings. Inferior gauge metal can lead to frame bowing or even catastrophic failure under heavy loads.
Choosing the best squat rack to start home gym ventures requires looking beyond the sticker price. Budget-tier options frequently utilize thin-walled tubing that lacks the density required for long-term stability. This introduces significant safety risks of budget options, such as wobbling during heavy compound movements or unstable J-cups that can damage expensive barbell knurling. Rather than chasing the absolute lowest cost, aim for high-value equipment that offers a balance of durability and safety. Investing in a robust, high-quality frame ensures your setup remains a reliable asset rather than a liability as your training intensity increases.
To navigate this decision, it is helpful to view your purchase through the lens of price vs. longevity. When building your home gym equipment essentials, you will generally encounter two distinct categories of investment. The first is the entry-level tier, which is often a compact squat rack guide for those with extremely limited space and light training goals. While these are cost-effective, they often sacrifice weight capacity and build quality to maintain a smaller footprint.
The second tier is the "long-term value" category. While the upfront cost is higher, these units are engineered with thicker steel gauges and reinforced welding. This ensures superior stability even as you progress from novice lifting to advanced strength training. For those building a sustainable fitness space, we recommend prioritizing a model with a high weight capacity and a rigid frame. A slightly higher initial investment in a quality rack prevents the need for frequent replacements, making it a much more efficient way to fund your long-term fitness journey.
Beyond the quality of materials, a common mistake is overspending on prestige rather than performance. Many buyers assume that a higher price tag automatically equates to a better experience, but in the context of home gym equipment essentials, brand name often carries a premium that doesn't translate to functional utility. You may find yourself overspending on unused features—such as advanced integrated digital displays or complex accessory attachment points—that offer little value to a standard strength routine.
Instead of chasing luxury, focus on smart budget allocation by prioritizing essential vs. luxury components. A high-quality, heavy-duty steel frame and reliable safety spotting mechanisms are non-negotiable. Once those core elements are secured, secondary features like specialized pull-up bars or specialized dip stations can be added later. This approach ensures scalability; you invest in a foundation that can grow with your strength levels without the immediate need for a complete overhaul. By focusing on structural utility rather than brand prestige, you can identify the best squat rack to start home gym builds that remain both functional and cost-effective over the long term.